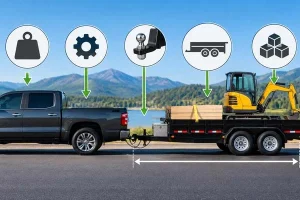
If you are trying to learn how to secure a car on a trailer, the most important thing to understand is that the job is not simply about making the straps feel tight. The real goal is to stop the vehicle from moving forward, backward, sideways, or upward while the trailer is moving. That sounds simple, but a car weighing several thousand pounds can create substantial force when the tow vehicle brakes hard, changes lanes, hits a pothole, or travels over a rough section of road. A setup that looks secure while parked can behave very differently once the trailer reaches highway speed. For that reason, a proper car trailer tie-down setup should start with the right trailer, suitable anchor points, correctly rated straps, and a clear understanding of where those straps should attach to the vehicle.

For most people searching for the best way to tie down a car on a trailer, the safest approach is to think in terms of a complete restraint system rather than individual straps. Four strong straps do not automatically make a safe setup if they are attached to weak points, routed over sharp edges, or positioned at poor angles. Likewise, a high-quality trailer cannot compensate for damaged webbing or an incorrectly balanced load. A reliable setup works because every part supports the next one. The trailer carries the weight, the anchor points transfer the load, the straps control movement, and the vehicle attachment method prevents damage. Once you look at the job this way, car transport becomes much easier to plan and inspect.
The first reason proper securement matters is simple: the car must remain in the same position throughout the trip. When a tow vehicle accelerates, the transported car naturally wants to move toward the rear of the trailer. When the driver brakes, the car wants to continue moving forward. During a turn, the load pushes toward one side. When the trailer hits a bump, the car may also experience vertical movement. This is why learning how to strap a car to a trailer requires more than preventing the wheels from rolling. You need a tie-down arrangement that controls movement in several directions at the same time.
The second concern is trailer stability. A car that shifts even a relatively small distance can change how weight is distributed between the trailer axles and the hitch. If too much weight moves toward the rear, tongue weight can decrease and the trailer may become more prone to sway. If the load moves too far forward, the hitch and rear axle of the tow vehicle may be subjected to more weight than intended. In either case, the driver may notice the problem only after the combination already feels unstable. Correct car positioning and secure tie-downs therefore work together. One cannot replace the other.
There is also the risk of vehicle damage. Many first-time haulers look underneath a car and attach a strap to the first metal component that appears strong. That can be a serious mistake. Brake lines, steering parts, anti-roll bars, control arms, exhaust components, wiring brackets, and thin body openings may not be designed for transport loads. Even if nothing fails completely, an incorrectly placed hook or strap can bend a component, damage paint, cut a brake hose, or place unnecessary load on the suspension. A safer method begins by identifying approved or structurally appropriate attachment points before tension is applied.
Before loading the vehicle, prepare all of the car trailer tie-down equipment you expect to use. This normally includes properly rated ratchet straps, wheel nets or axle straps depending on your preferred method, sound trailer anchor points, and edge protection where webbing could contact metal. Wheel chocks can also be useful during loading and setup, although they should not be treated as a substitute for the actual tie-down system. If the trailer uses E-track, recessed D-rings, stake pockets, or dedicated wheel-restraint hardware, check that the straps and fittings are compatible before the vehicle is driven onto the deck.
Pay particular attention to the working load limit of each strap. Many people focus on the much larger breaking-strength number because it looks more impressive on the package. For practical transport planning, the working load limit is the more useful figure because it represents the load the equipment is designed to handle in service. Do not mix unknown or unmarked straps into a vehicle transport setup simply because they look thick enough. Webbing can appear strong while its stitching, hook, or ratchet has a much lower capacity. If you cannot identify the rating, it should not be your first choice for securing a valuable vehicle.
When choosing car tie-down straps for a trailer, start with the way you intend to restrain the vehicle. Wheel straps and wheel nets secure the car through the tires and are widely used because they reduce the need to find attachment points underneath the chassis. Axle straps wrap around a suitable structural location and provide a soft connection point for the main ratchet strap. Some vehicles also provide dedicated transport slots or factory tie-down points that accept particular hook designs. Each system can work well when it is matched to the trailer and vehicle.
Inspect the condition of the straps before every trip. Run your hand along the webbing and look for cuts, melted fibers, severe abrasion, damaged stitching, chemical contamination, or areas that have become unusually stiff. Check hooks for bending, cracks, or excessive corrosion. Operate each ratchet before loading the car so you know it opens, closes, and locks correctly. This check takes only a few minutes, but it is much easier to discover a bad ratchet in the yard than after the car is already loaded and you are trying to leave.
The trailer anchor points deserve the same attention as the straps. A heavy-duty strap attached to a damaged anchor is still a weak securement system. Check D-rings for cracked welds, distortion, corrosion, or movement around their mounting points. If you use E-track, inspect the track and its fasteners rather than assuming the fitting alone determines capacity. On trailers with stake pockets or welded brackets, make sure the metal around the attachment point is in good condition and that previous overload has not stretched or bent it.
Anchor location also affects how well the car is restrained. A strap that pulls almost vertically may provide good downward force but relatively little resistance to forward or rearward movement. A strap angled toward the front or rear of the trailer can contribute more longitudinal restraint. The exact arrangement depends on the tie-down system, but the general principle is easy to remember: look at the direction in which the strap pulls. If all four straps are pulling in nearly the same direction, they may not provide balanced control of the car.
A safe loading process begins before the car reaches the ramps. Park the tow vehicle and trailer on firm, reasonably level ground whenever possible. Confirm that the trailer coupler is fully latched, the safety chains are connected, and the tow vehicle parking brake is applied. Inspect the ramps and make sure they are properly engaged with the trailer. Loading a car can place substantial weight on the back of the trailer, especially before the front axle of the car reaches the deck, so you do not want the trailer moving or separating during this stage.
Next, inspect the trailer tires, wheels, deck, lights, breakaway system if equipped, and overall condition. Check trailer tire pressure when the tires are cold and look for cracks, bulges, unusual wear, or visible damage. Verify that the trailer's rated payload is sufficient for the car you intend to haul. Do not forget that accessories and additional cargo also count toward trailer load. A winch, spare tires, toolboxes, fuel containers, ramps, recovery equipment, and other items can add more weight than expected.
Low-clearance vehicles need additional planning. Sports cars, modified cars, and vehicles with long front overhangs can contact the ramp or trailer deck during loading. Longer ramps, race ramps, or a tilt trailer may reduce the loading angle. The important point is to solve the clearance problem before driving farther up the ramps. If you hear scraping or see the bumper approaching the deck, stop and reassess rather than adding throttle and hoping the car clears.
One of the most common questions is where to position a car on a trailer. The answer is not simply "in the middle." The car should be positioned so that the trailer has appropriate tongue weight while remaining within the ratings of the trailer, hitch, and tow vehicle. Because different cars carry their weight differently, the ideal tire position can change even when two vehicles are similar in overall size. A front-engine sedan, rear-engine sports car, electric vehicle, and pickup truck can place very different loads on the trailer axles.
Too little tongue weight can make a trailer feel unstable and may increase the tendency to sway. Too much tongue weight can overload the tow vehicle's rear axle or hitch and can reduce front axle loading on the tow vehicle. That can affect steering and braking. The correct approach is to follow the trailer and tow vehicle manufacturer's loading guidance and verify tongue weight when possible rather than judging only by how much the back of the tow vehicle drops.
If you transport the same car regularly, you can make loading more repeatable by marking where the front tires normally sit after you have confirmed the correct weight distribution. This is particularly useful for race cars, show cars, dealership transport, and other repeated trips. However, do not blindly use the same mark after changing the trailer setup. Adding a toolbox, spare tire rack, winch, additional cargo, or different vehicle can change the balance enough to require a new position.
Once the vehicle is correctly positioned, the actual securement process can begin. Before working around the car, make sure it cannot roll unexpectedly. Follow the vehicle manufacturer's recommendations regarding the transmission and parking brake. Many automatic vehicles are placed in Park, while manual vehicles may be left in gear, but these measures should never be considered the primary restraint system. The tie-downs need to hold the car securely on their own.
- Position the vehicle correctly on the trailer and confirm that it is centered from side to side.
- Select the appropriate front and rear vehicle attachment points or wheel-restraint locations.
- Connect the first pair of straps and remove most of the slack without fully tightening one side.
- Connect the corresponding straps on the opposite side.
- Install the rear restraints and check that the car remains centered.
- Tighten each strap progressively rather than applying maximum tension to one corner first.
- Check all hooks, ratchets, wheel nets, axle straps, and trailer anchors.
- Make sure no webbing contacts a sharp edge, hot exhaust component, brake line, or moving part.
- Secure loose strap tails so they cannot flap, drag, or become wrapped around a wheel or axle.
- Walk around the entire trailer and inspect the setup again before driving away.
A four-point tie-down setup is a common choice because it gives you independent restraint at each corner or wheel. The important detail is not simply the number four. Each restraint should contribute to keeping the vehicle where it belongs. Stand behind the trailer and check whether the car is still centered after the straps are tensioned. Then look from the side and confirm that the front and rear restraints are pulling in useful directions. A visual check often reveals a poorly routed strap that seemed fine while you were kneeling beside the trailer.
If you want to know how to secure a car on a trailer without attaching straps to the chassis, wheel straps are often one of the most practical choices. These systems hold the tire against the trailer while allowing the vehicle suspension to move more naturally. Depending on the trailer, the restraint may be a wheel net that passes over the tread, a lasso-style tire strap, or a system that connects the tire to E-track or dedicated deck anchors.
The key is correct placement. The webbing should sit on the tire as designed rather than resting against the wheel face or slipping toward the tire sidewall. Before tightening, check that the strap is centered and that its hardware cannot contact painted wheels, brake components, body panels, or suspension parts. Tighten according to the strap manufacturer's instructions and then look at the strap from both the front and side. If the webbing appears likely to walk off the tire as the suspension moves, stop and correct the routing.
Wheel-based securement can be especially useful for performance cars and low vehicles because you may not need to crawl beneath the chassis to locate a tie-down point. It also reduces the chance of accidentally hooking onto an unsuitable suspension component. That said, wheel straps still need properly positioned trailer anchors. A good wheel net attached at a poor angle or to a weak anchor does not become safe simply because it fits the tire correctly.
Axle straps are another widely used option, but the term "axle strap" can be misleading because not every modern car has a convenient solid axle that you can safely wrap. Many passenger vehicles use independent suspension. In these cases, you need to identify a strong, appropriate structural location that allows the strap to sit without interfering with brake hoses, ABS wiring, steering parts, CV joints, exhaust components, or thin sheet metal.
A common axle strap is a short section of protective webbing with reinforced loops or D-rings at the ends. It wraps around a suitable structural location, and the main ratchet strap connects to it. This arrangement keeps the metal hook away from the vehicle and can reduce direct contact damage. However, the soft strap itself still needs a clean path. If it is dragged across a sharp bracket or rough edge, movement during transport can slowly cut into the webbing even when the strap looked perfect at the start of the trip.
After fitting the axle strap, pull the main ratchet strap toward the trailer anchor and remove slack gradually. Repeat the process on the opposite side before applying full tension. Then inspect the area with a flashlight if necessary. From outside the trailer, a strap may appear clear while actually touching a brake line several inches farther underneath the vehicle. This close inspection is particularly important when you are transporting a car you have never tied down before.
Yes, some cars and trucks can be tied down using designated structural or transport attachment points, but this is an area where guessing causes problems. Older body-on-frame vehicles may provide obvious heavy structural locations. Modern unibody cars are different. A hole in the underside of a body shell does not automatically mean it is a tie-down slot, and a visible bracket does not automatically mean it is designed to carry transport loads.
If the manufacturer provides dedicated shipping or tie-down slots, use the appropriate hook or fitting for those points. Different systems may use T-hooks, J-hooks, R-hooks, cluster hooks, or other specialized hardware. The hook should fit correctly rather than being forced into an opening that happens to be nearby. When you are uncertain, consult vehicle service information, the owner's manual, or the vehicle manufacturer instead of assuming that a recovery point and a transport point serve the same purpose.
Frame or body tie-down methods can also affect suspension movement differently from wheel straps. When the chassis is pulled down toward the trailer, suspension compression becomes part of the setup. This is why some people prefer wheel securement for cars with soft suspension, adjustable coilovers, or sensitive ride-height settings. Neither method is automatically correct for every vehicle. The better choice is the method that matches the vehicle's approved attachment points, the trailer's anchor layout, and the tie-down equipment you have available.
Car tie-down straps should be tight enough to remove slack and keep the restraint firmly seated, but excessive tension does not automatically make the setup safer. Ratchet mechanisms provide substantial mechanical advantage, which means it is possible to apply more force than many users realize. If a wheel strap is overtightened, the tire can be compressed unnecessarily. If a chassis-mounted strap is overtightened, the suspension may be pulled down more than intended and additional stress can be placed on attachment points.
A better approach is progressive tension. Tighten the front left strap partway, then the front right. Move to the rear and repeat the process. Walk around the vehicle and continue adjusting until the car is held securely and evenly. Watch the position of the car while doing this. If it begins moving toward one side of the trailer, one strap may be pulling much harder or at a different angle than the others.
Once the final tension is set, make sure each ratchet handle is completely closed and locked. Then deal with the loose webbing. Do not leave several feet of strap tail hanging beside the trailer. At road speed, loose webbing can flap against the car, fray against the trailer, or become caught in rotating components. Roll or secure the excess in a way that prevents it from coming loose during travel.
Drivers often ask whether car trailer straps should be crossed in an X pattern. The answer depends on the securement method and anchor layout. Crossing straps can provide useful lateral restraint in some axle or chassis tie-down arrangements, but it is not a universal rule. Many wheel-restraint systems are specifically designed to run from each tire to a nearby anchor point without crossing. Changing that geometry may cause the strap to sit incorrectly on the tire.
Instead of asking whether straps should always be crossed, ask what movement each strap is controlling. A correctly positioned straight strap can provide strong forward or rearward restraint. An angled strap may contribute more lateral control. If the manufacturer's instructions specify a particular routing pattern, follow that pattern rather than changing it because another trailer uses a different setup.
Also consider what would happen if one strap failed or loosened. A good four-point arrangement should not depend entirely on one piece of webbing to keep the vehicle from moving sideways. This is another reason independent restraints are useful. They create redundancy and make it easier to identify whether each corner is still properly secured during an inspection stop.
One of the most common mistakes is choosing a convenient attachment point instead of a suitable one. When someone is in a hurry, it is tempting to hook onto a control arm, sway bar, thin chassis opening, tow loop, or suspension bracket without verifying its purpose. The strap may tighten successfully, which creates a false sense of security. The problem may only appear after several miles when the hook bends, the strap slides, or the component becomes damaged.
Another mistake is using damaged webbing because the strap has not actually broken yet. A deep cut across one edge, heavy abrasion, loose stitching, or heat damage can reduce the useful strength of the strap. If the car weighs several thousand pounds, replacing a questionable strap is a small expense compared with repairing the vehicle, trailer, or something else affected by a load shift.
Poor load balance is equally important. You can use excellent straps and still create an unsafe towing combination if the vehicle is positioned too far rearward. Drivers sometimes focus so much on how to tie down a vehicle on a trailer that they overlook the basic loading position. Securement and weight distribution should be treated as one process. First position the vehicle correctly, then restrain it there.
Other common mistakes include leaving strap tails loose, allowing webbing to rub against sharp steel, placing straps near hot exhaust components, failing to close ratchets fully, using anchor points of unknown strength, relying on the parking brake as a tie-down, and failing to inspect the setup after the first part of the journey. Most of these problems are easy to avoid. They usually occur because the loading process becomes rushed.
| Method | Best Suited For | Main Advantage | What to Check |
|---|---|---|---|
| Wheel nets | Passenger cars, sports cars, repeated transport | Keeps most tie-down forces at the tire | Correct fit, tire coverage, anchor position, strap seating |
| Lasso wheel straps | Cars transported on trailers with compatible wheel anchors | Quick setup without searching for chassis points | Sidewall contact, wheel contact, strap movement |
| Axle straps | Vehicles with suitable structural suspension or axle locations | Flexible attachment and reduced metal-to-metal contact | Brake lines, wiring, sharp edges, suitable structural routing |
| Factory transport points | Vehicles with clearly identified shipping slots | Uses locations designed for vehicle transport | Correct hook type and manufacturer guidance |
| Frame or chassis restraint | Vehicles with suitable approved structural locations | Strong direct restraint when properly configured | Suspension compression, correct attachment point, strap angle |
Do not assume the first tightening is the last time you will need to inspect the straps. After the trailer starts moving, several parts of the system can settle. Webbing may seat more tightly around a tire or axle, hooks may move slightly into their final position, tires may compress, and suspension movement can change strap tension. This is why experienced haulers often stop after the initial portion of a journey and inspect the setup again.
During the recheck, do more than pull on the straps. Look at the position of the car relative to the trailer. Check whether each wheel remains where it started, whether the straps have moved on the tires, and whether the hooks are still fully seated. Touch the webbing near contact areas and look for fresh abrasion. Check the ratchet handles and verify that loose tails are still secured.
Longer trips justify additional inspections, particularly after rough roads, major stops, severe weather, or unusual braking. Rain can introduce water and road debris into the setup, while vibration can reveal routing problems that were not visible when the trailer was parked. A short inspection at a fuel or rest stop is far easier than dealing with a shifted vehicle later.
Securing a low sports car or modified vehicle introduces two extra concerns: ground clearance and access. The loading angle may cause the front splitter, bumper, exhaust, or underbody to contact the trailer. Even after the car is on the deck, low ride height may make it difficult to reach axle or chassis attachment points. In this situation, wheel-based tie-down systems can be particularly useful because most of the work takes place around the tire rather than underneath the car.
Before loading, consider the ramp breakover angle and approach angle. Longer ramps reduce the change in angle between the ground and trailer deck. Some operators also use purpose-built ramp extensions or tilt trailers. Avoid makeshift solutions that can shift during loading. Once the car is on the trailer, check clearance around wheel straps carefully because wide tires, large brake calipers, or low fenders may limit the available space.
If the car has adjustable suspension, do not change ride height simply to make the tie-down process easier unless the vehicle setup allows it and you understand the consequences. It is usually better to adapt the trailer loading system to the car than to alter the car solely because the existing trailer arrangement is inconvenient.
A non-running car should generally be loaded using a properly rated winch rather than uncontrolled pushing or pulling. Connect the winch to an appropriate recovery or loading point and keep people clear of the cable or synthetic rope path. Move the vehicle slowly so someone can watch wheel alignment and clearance. If the steering is locked or damaged, additional planning may be needed to keep the vehicle centered on the ramps.
Once the disabled vehicle reaches the correct position, secure it in the same way you would a running car. The fact that it cannot drive under its own power does not reduce the forces acting on it while the trailer is moving. A car with transmission damage, missing brakes, or damaged suspension may require even more attention because you cannot rely on the parking brake or drivetrain to help keep it stationary during setup.
Damaged vehicles also require a closer inspection of tie-down points. Collision damage may bend suspension components or weaken areas that would normally be suitable for a strap. When in doubt, choose wheel-based securement or obtain professional guidance rather than attaching to damaged structural parts.
Many private and professional vehicle transport setups use four independent restraints, with one at each wheel or corner. This gives clear control of both the front and rear of the car and makes it easier to distribute restraint evenly. The exact legal requirement can vary depending on vehicle weight, jurisdiction, and whether the transport is commercial, so you should also check the rules that apply to your operation. From a practical standpoint, a four-point system is popular because it provides useful redundancy and makes inspection straightforward.
For many passenger cars, tying down by the wheels is convenient because it avoids searching for structural points under the chassis and allows the suspension to move naturally. Frame or structural tie-downs can also work well when the vehicle has approved attachment points and the correct hardware is used. Neither method is automatically better in every situation. The vehicle design, trailer anchor layout, ride height, and intended tie-down system should determine which method you choose.
You should use properly rated vehicle transport straps rather than lightweight utility straps. Check the working load limit, webbing width, hook type, ratchet construction, and compatibility with the trailer anchors. The strap also needs to be in good physical condition. A heavy-looking strap with unknown ratings or damaged stitching is not a good choice simply because it can be tightened.
Follow the vehicle manufacturer's recommendations for transport. Automatic vehicles are often placed in Park, while manual cars may be left in gear. However, the transmission should never replace proper tie-downs. The vehicle should remain secure because the wheel, axle, or structural restraint system is holding it in position, not because the parking pawl or gearbox is carrying the transport load.
The parking brake can provide an additional layer of protection during loading and transport when the vehicle manufacturer allows it, but it should not be considered a substitute for straps. Some specialized transport situations may require different procedures, so check the vehicle instructions. Even with the parking brake applied, the car should still be fully restrained at the appropriate front and rear points.
A tow or recovery hook is not automatically a transport tie-down point. Recovery points are designed for particular pulling loads and may not be intended to handle the continuous multidirectional forces of vehicle transportation. Use the tow hook only when the vehicle manufacturer or tie-down system specifically identifies it as suitable for this purpose. Otherwise, use dedicated transport points, wheel straps, or appropriate axle straps.
Crossing straps can add lateral restraint in some chassis and axle tie-down arrangements, but it is not necessary for every system. Wheel straps often have a specific straight or angled routing pattern designed around the trailer's anchor positions. Follow the instructions for your equipment rather than treating an X pattern as a universal requirement. What matters is that the completed setup effectively controls forward, rearward, side-to-side, and vertical movement.
Inspect the straps before departure and check them again after the trailer has traveled enough distance for the equipment to settle. Longer trips should include additional inspections during normal stops. You should also recheck the car after rough roads, sudden braking, severe weather, or anything else that could have changed the tie-down tension. During every check, inspect the entire system rather than only the ratchet handle.
Some regulations and specialized securement systems may permit particular two-tiedown configurations, but that does not mean two ordinary straps are suitable for every trailer and vehicle. A four-point setup is commonly used because it makes it easier to restrain each end and each side independently. If your trailer or transport system was designed around fewer restraints, follow its approved instructions and the legal requirements that apply to your situation.
Reroute the strap whenever possible so it does not contact the sharp edge at all. If the strap must pass over an abrasive area, use suitable edge protection designed for tie-down webbing. Do not assume that a piece of thin cloth will provide enough protection. After the first part of the trip, inspect that area again because vibration can move both the strap and the protector.
Yes, but a vehicle with damaged suspension may require a different loading and securement strategy. Do not attach straps to bent or compromised components. Wheel-based restraints can sometimes reduce the need to rely on damaged suspension parts, but the vehicle still needs to sit safely on the trailer. If collision damage is severe or the wheels cannot support the car normally, professional recovery equipment may be necessary.
Look beyond deck size. Check payload capacity, axle ratings, tire ratings, ramp design, deck width, fender clearance, tie-down anchor positions, winch mounting options, and the types of wheel restraint systems the trailer can support. Think about the vehicles you plan to carry, especially their weight, wheelbase, ground clearance, and width. A well-designed car trailer should make correct loading and tie-down placement straightforward instead of forcing you to improvise every time.
If you remember only one thing about how to secure a car on a trailer, remember that the entire setup matters. The safest transport arrangement begins with a trailer that is capable of carrying the vehicle, correct load positioning, strong anchor points, properly rated tie-down equipment, and attachment locations that will not damage the car. Tight straps are only one part of that system.
For many car owners, wheel straps or four-point vehicle tie-down systems offer a practical combination of control and ease of use. Axle straps and dedicated structural attachment points are also effective when they are used correctly. Whichever method you choose, avoid improvising with unknown components and do not attach straps to suspension parts simply because they are easy to reach.
Take a few extra minutes before departure to inspect every strap, hook, ratchet, anchor, and contact point. Then stop and inspect the setup again after the equipment has settled. That routine may feel repetitive, but vehicle transport is one area where repetition is useful. A car that leaves the yard properly positioned and properly restrained should arrive in the same position, without damaged components, loose straps, or unpleasant surprises.